
Migrating your website to WordPress may seem challenging, but with proper planning and execution, you can achieve a seamless transition. This comprehensive guide covers every crucial step in detail, ensuring your migration is smooth, optimized for SEO, and user-friendly.
Why Migrate Your Website to WordPress?
WordPress offers numerous advantages that make it a superior choice for website management:
- User-Friendly Interface: Easy to manage without coding skills.
- SEO Optimization: Flexible control over metadata, URL structure, and content hierarchy.
- Extensive Plugin Support: Thousands of plugins to improve functionality.
- Customizable Designs: Endless design possibilities using themes like GeneratePress and Elementor.
Now, let’s dive into the detailed step-by-step process for migrating your website to WordPress.
Step 1: Extract the Sitemap of Your Existing Website
Before beginning, it’s essential to create a structured list of your website’s pages to ensure nothing is missed.
If Your Website is Indexed in Search Engines:
- Use Screaming Frog, Seomator, or search
site:yourwebsite.comin Google to extract the sitemap. - Download the sitemap file and convert it into an Excel sheet for easy reference.

If Your Website is Not Indexed:
- Manually browse your website and document all URLs in a spreadsheet.
- Use tools like Visual SEO Studio to crawl and list non-indexed URLs.
✅ Pro Tip: List key content details like page titles, meta descriptions, and focus keywords to simplify the SEO optimization phase later.
Step 2: Install WordPress on a Staging or Temporary Domain
For a smooth migration, first set up WordPress in a controlled environment to build and test your new website.
Recommended Setup Options:
- Use a Staging Environment if your hosting provider offers it (e.g., Hostinger, SiteGround).
- Alternatively, install WordPress on a Temporary Domain for development purposes.
- For offline development, tools like LocalWP, XAMPP, or WAMP allow you to build WordPress locally.
✅ Pro Tip: Installing WordPress in a staging environment ensures your existing website remains live without downtime.
Step 3: Choose a Fast Theme and Build Layouts with Elementor
Choosing the right theme is crucial for performance and design flexibility. Recommended themes include:
- GeneratePress – Lightweight, fast, and highly customizable.
- Astra – Known for its compatibility with Elementor.
Steps to Recreate Your Website Using Elementor:
- Install Elementor and import a suitable template to speed up the design process.
- Recreate your old website’s structure by building each page individually.
- Maintain the same content structure, ensuring menus, images, and internal links match the original website.
- Test your layouts for responsiveness across desktop, tablet, and mobile.
✅ Pro Tip: Use Elementor’s Navigator tool for efficient content alignment and structure management.
Step 4: Optimize the New Website for Technical SEO
Once your page layouts are complete, focus on enhancing your site’s SEO performance.
Key Technical SEO Tasks:
- Add Title Tags, Meta Descriptions, and Alt Text to all pages and images.
- Implement proper Heading Hierarchy (H1, H2, H3) for improved readability.
- Enable Schema Markup using RankMath or Yoast SEO to improve search visibility.
- Optimize images with tools like Smush or Imagify to improve load times.
- Enable caching via WP Rocket or LiteSpeed Cache for better performance.
✅ Pro Tip: Run your site through PageSpeed Insights to identify performance issues and improve scores.
Step 5: Extract and Match URLs to Avoid Broken Links
Maintaining URL consistency is essential to preserving SEO rankings.
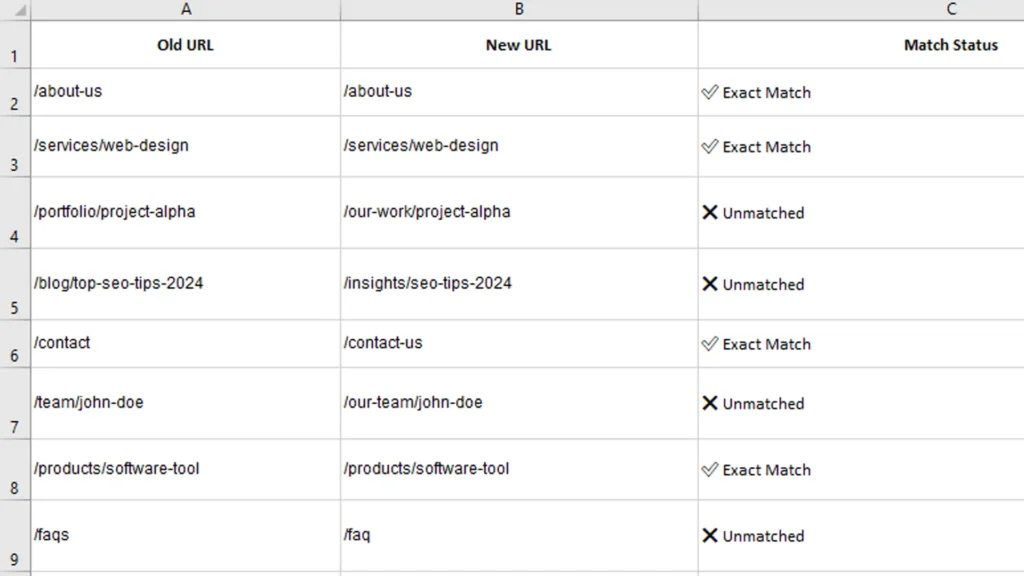
Steps to Match Old and New URLs:
- Extract old URLs using Screaming Frog or Ahrefs.
- Create a detailed spreadsheet comparing old and new URLs.
- Ensure each new page follows a similar URL structure to minimize redirects.
✅ Pro Tip: Use a 301 redirect plugin like Redirection to fix URL mismatches.
Step 6: Migrate the WordPress Site to the Live Domain
Once the new website is finalized and thoroughly tested, it’s time to make it live.
Recommended Migration Methods:
- Automated Migration Tools: Use tools like All-in-One WP Migration or Duplicator for a seamless transfer.
- Manual Migration: Transfer your WordPress files via FTP and import the database using phpMyAdmin.
✅ Pro Tip: Always back up your existing site before proceeding with the migration.
Step 7: Redirect Old URLs to Preserve SEO Value
If some URLs change during migration, proper redirection is crucial.
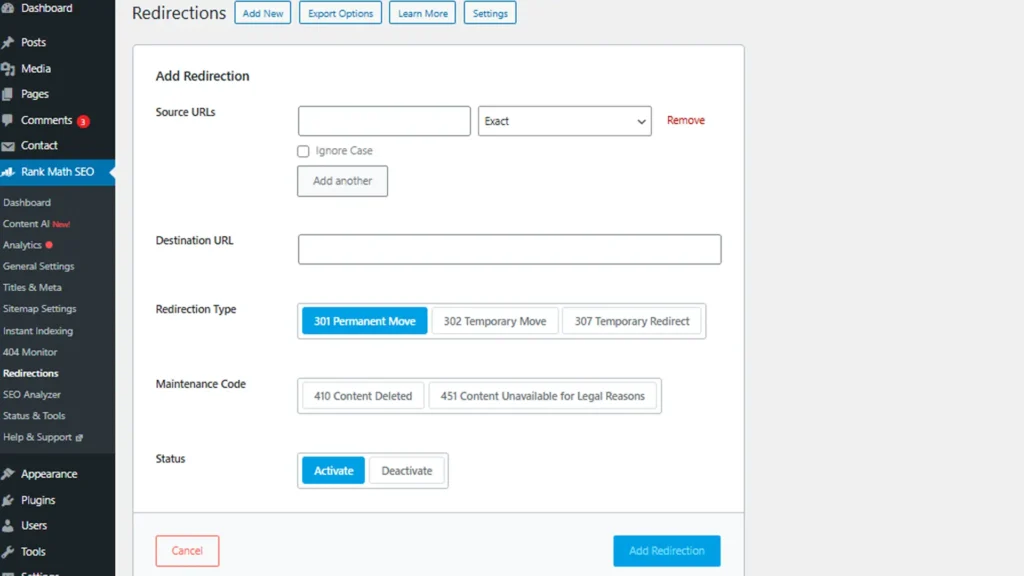
Steps to Redirect URLs:
- Install a redirection plugin like RankMath, Yoast, or Redirection.
- Map old URLs to their corresponding new pages using 301 redirects.
- Test each redirect to ensure users land on the correct pages.
✅ Pro Tip: Redirect your old homepage URL to the new homepage if the URL has changed.
Step 8: Perform a Post-Migration Audit and Fix Errors
After migration, conduct a comprehensive audit to detect errors and SEO issues.
Recommended Audit Tools:
- Screaming Frog – To identify broken links, missing metadata, and technical issues.
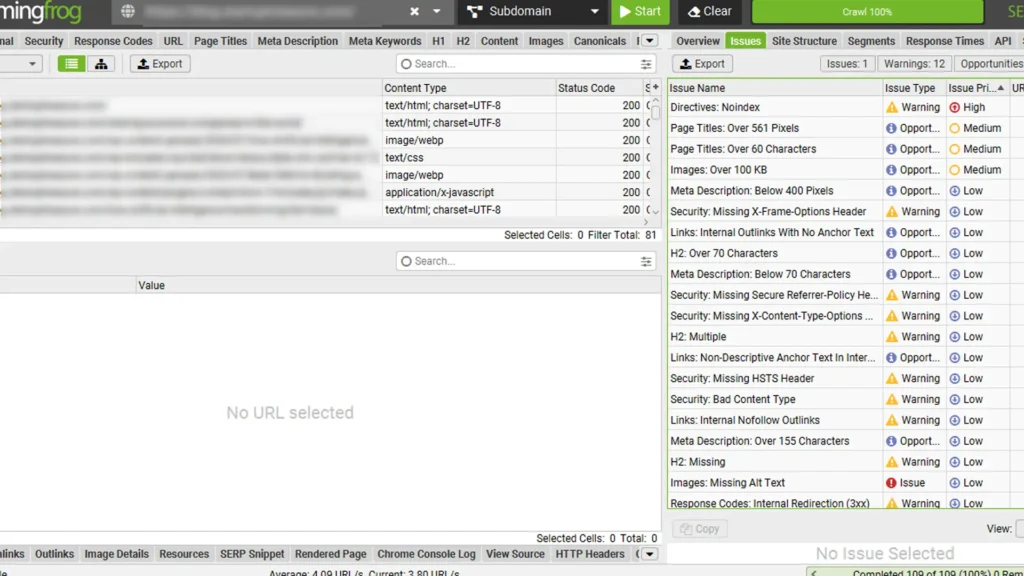
- Google Search Console – To monitor indexing errors, sitemap submissions, and search performance.
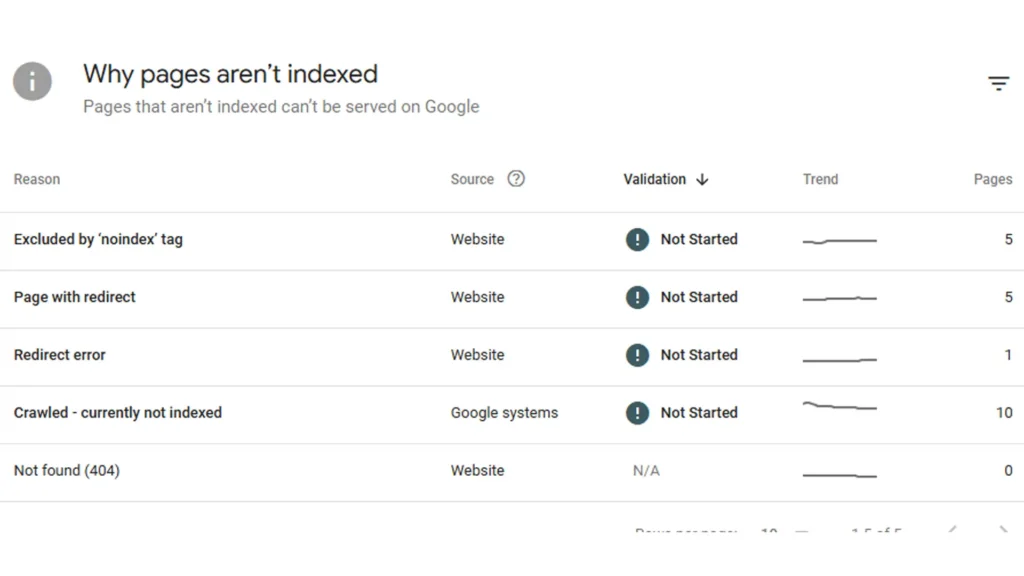
Common Issues to Fix:
- Missing images or broken links
- 404 errors on key pages
- Incorrect meta descriptions or missing canonical tags
✅ Pro Tip: Regularly monitor Search Console for 2-3 weeks to identify and resolve post-migration issues.
Step 9: Final Check and Celebration
Once all errors are fixed, test your website thoroughly:
- Verify responsive design across all devices.
- Test contact forms, payment gateways, and other interactive elements.
- Perform a final SEO check using SEMrush or Ahrefs.
✅ Pro Tip: Inform Google about your updated website structure by resubmitting your sitemap in Google Search Console.
Bonus Tips for a Successful WordPress Migration
✅ Use a Backup Plugin like UpdraftPlus or BackupBuddy to safeguard your website’s data before and after migration.
✅ Enable SSL Certificates for secure browsing.
✅ Regularly update WordPress, themes, and plugins for optimal performance and security.
🚀 Need Expert Help Migrating Your Website to WordPress? Contact Us or Fiverr Today for a Seamless Transition!
Conclusion
Converting your website to WordPress may seem complex, but following these detailed steps ensures a smooth and secure migration. With proper planning, SEO optimization, and performance checks, you can launch a fast, scalable, and user-friendly WordPress site that boosts your online presence.
About Nitish Singh Chauhan
Tech Enthusiast | Programmer | SEO Specialist With a passion for technology for over 9 years, I've gained experience working with various startups as a programmer and SEO specialist. My journey began through self-learning and online courses, where I mastered HTML, CSS, JavaScript, and Python. I thrived on the challenges faced while launching my own company focused on Information Transport Systems (ITS) using IoT technology. This experience ignited my interest in SEO, website design, and development. A firm believer in the power of open-source communities, I'm excited to share my knowledge and contribute through informative blog posts and engaging videos.